To be able to design a CpG assay using the PyroMark Assay Design software, you first need your DNA sequence of interest that contains the region you are interested in sequencing, as well as extra to account for optimal primer design. You can use most publicly available genome browsers for this, such as UCSC Genome Browser or Ensembl.
As an example, I will design an assay to be able to sequence the CpG island in the human IGF2R gene promoter region.
1. Download the region of interest
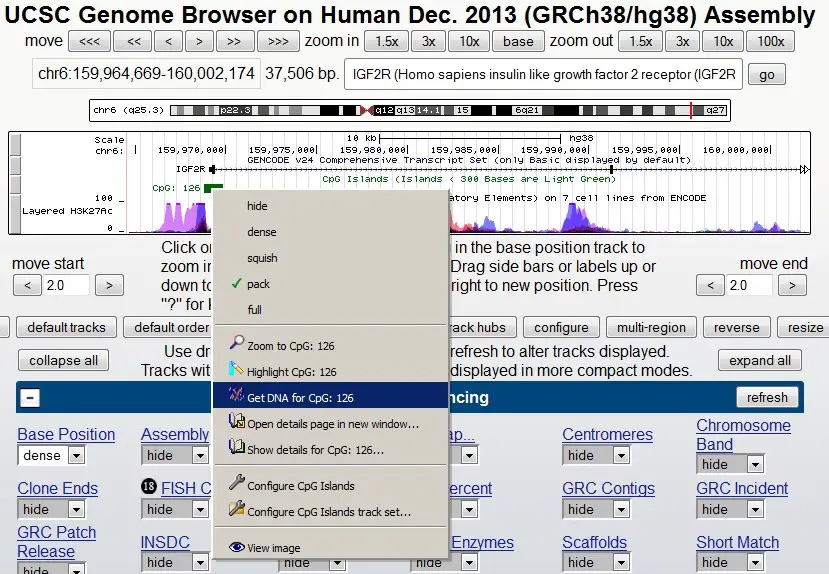
Firstly, to get the DNA sequence for this region, I will go to the UCSC Genome Browser and search for the IGF2R gene.
 If you cannot see the CpG islands on the output window, scroll down to the ‘Regulation‘ section and by using the dropdown option change ‘CpG Islands (Islands < 300 Bases are Light Green)‘ from ‘hide‘ to ‘show‘. The CpG islands will now show up as a green box. The number indicates how many CpG sites are within that island.
To get the DNA sequence for the CpG island, right-click on the green box and select the ‘Get DNA for CpG: 126‘ option:
 A new window will appear. Here you can specify how much of the DNA sequence you want to download. I recommend adding extra bases both upstream and downstream of the region of interest. This will allow for more flexibility when designing the primers. Under the ‘Sequence Retrieval Region Options:‘ header, add ‘300‘ bases to both the upstream and downstream boxes:
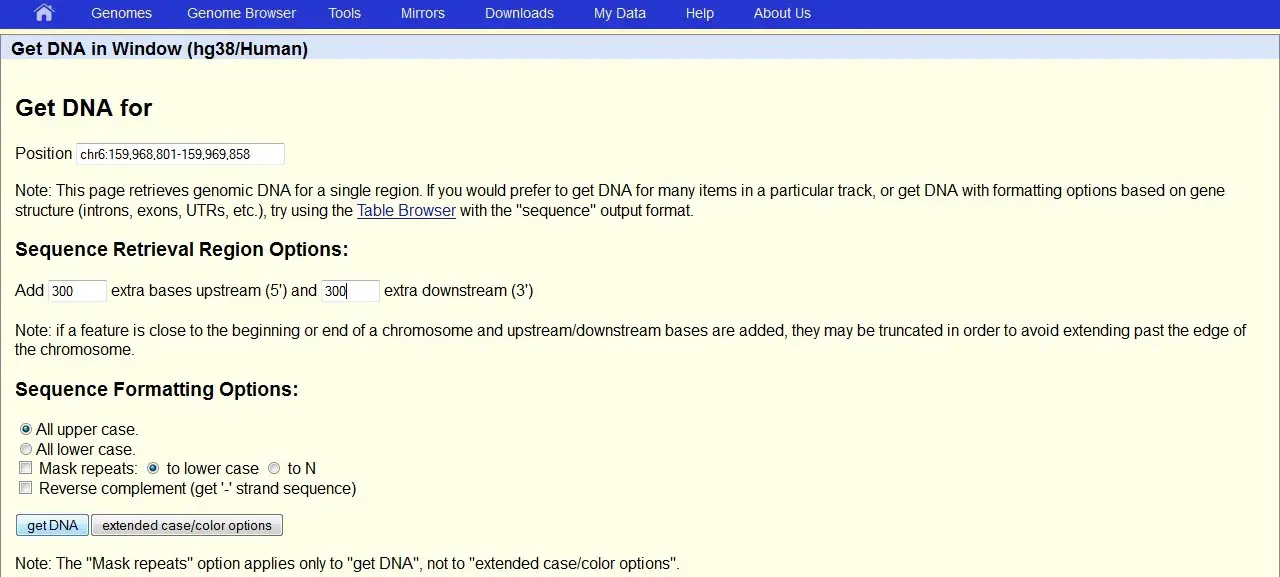 Then select the ‘get DNA‘ button. This will open a new window with the DNA sequence for that CpG island, as well as 300 bases extra before and after the island. This is the sequence we want to use for our CpG assay design, so copy all of this. I also find it good practise to copy and paste this whole window into a Word document for future reference. The line at the top of the sequence is also useful to keep since it contains information about the genome you used, the specific region you copied and the strand oritentation.
2. Open up PyroMark Assay Design
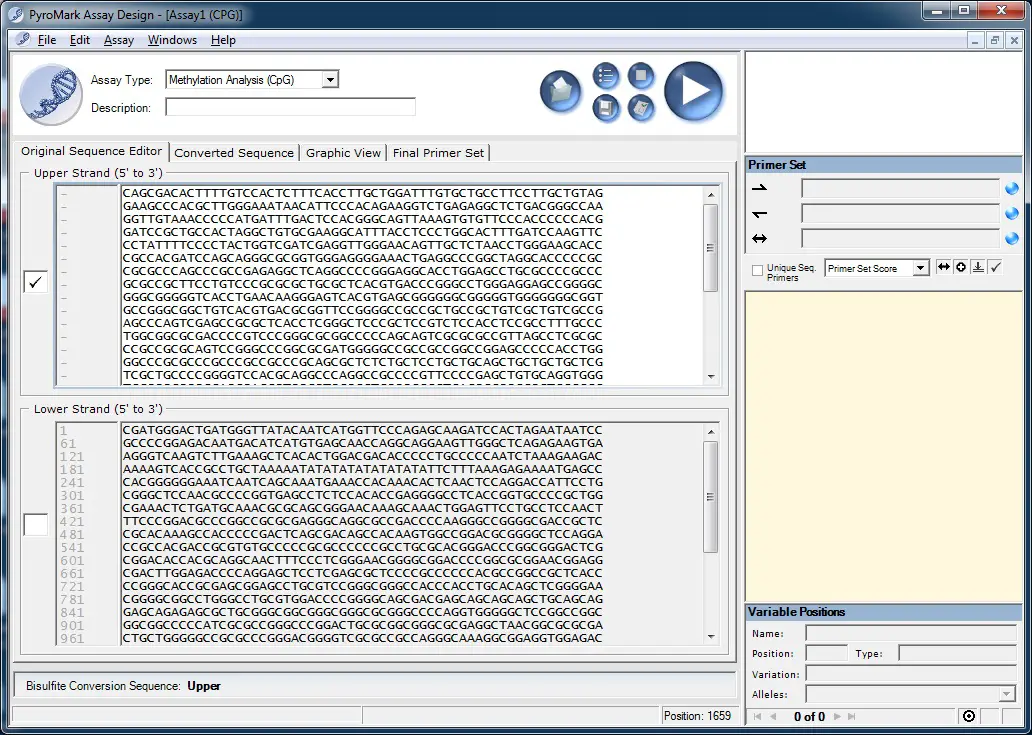
Open up the PyroMark Assay Design software and select ‘Methylation Analysis (CpG)‘ as the ‘Assay Type‘. In the ‘Upper Strand (5′ to 3′)‘ window, paste the DNA sequence you have just copied:
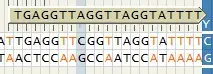
 Next, click on the ‘Converted Sequence‘ tab to view the bisulfite DNA sequence. Here you need to tell the PyroMark Assay Design software which part of the sequence you are interested in sequencing. The software highlights converted cytosine (C) bases as red thymine (T) bases and CpG sites as bold cytosines. Select a region of interest by clicking and dragging over the sequence. Next, right-click on the sequence and go to ‘Target Region > Set Target Region‘:
 Finally, click the large blue play button at the top of the software to run the assay design program.
3. Select your primer sets
Upon completion of the assay design analysis, you will be presented with a graphic view of your candidate primer sets (forward, reverse and sequencing primers). The primer sets are given a score out of 100 and are ranked in descending order. The scores are calculated based on numerous primer parameters, such as the potential for mispriming, the primer length and the liklihood of primer dimer. In theory, the higher the score, the better they should perform during the PCR reaction.
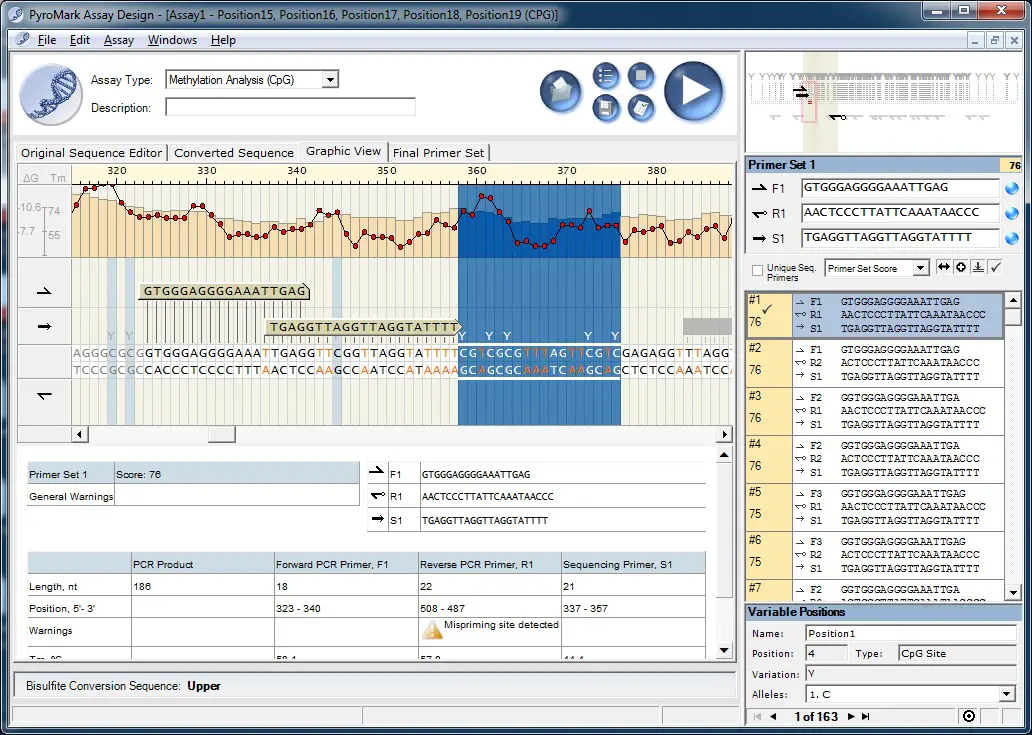 Through the use of the ‘Graphic View‘ you can see exactly where each primer should bind. Additionally, by double-clicking on a primer set in the list on the right, you can view the ‘Pyrosequencing Assay Design Analysis Report‘. This is a detailed document with a plethora of primer features and tests. You will want to save this file for when you come to create the CpG assay since it contains the all important ‘Sequence to Analyze‘.
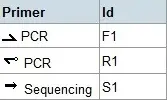
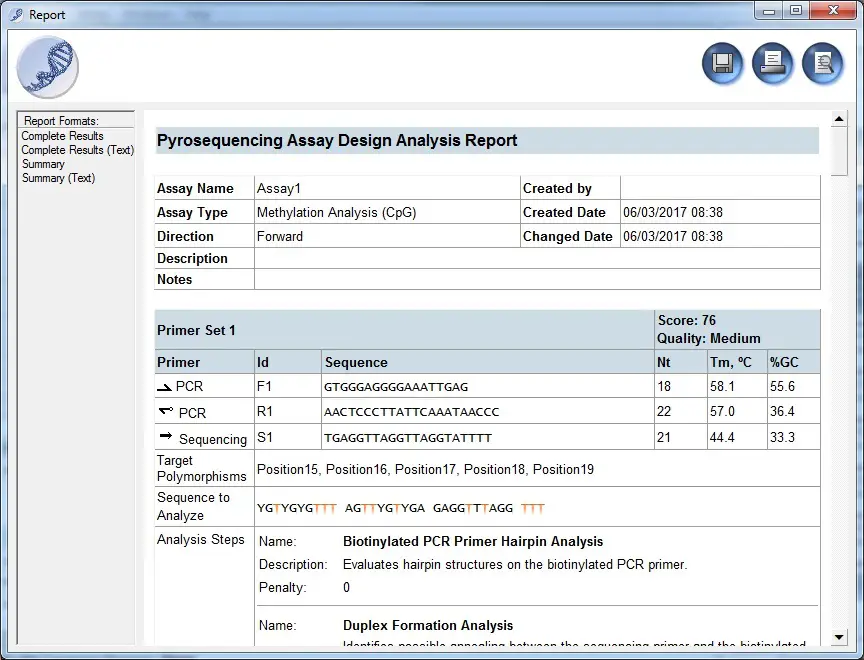 Another important thing to consider before ordering the primers is to check which primer (forward or reverse) requires a 5′ biotin tag modification. This is indicated by a small circle on one of the primers. For example, in the report above you can see that the small circle is located on the reverse primer:
 4. Bisulfite pyrosequencing primer parameters
So, how do you know what makes a good primer set for bisulfite pyrosequencing? Here are some features you should look for when designing primers for bisulfite pyrosequencing:
Select a primer set with a high quality score
Since the PyroMark Assay Design software analyses and ranks each primer set in quality order, according to numerous in silico analysis, I recommend selecting those with a high quality score (ideally >70).
Avoid primers which bind over CpG sites
Since you do not know whether a CpG site will be methylated or unmethylated, it is not suitable to design primers which will bind over a CpG site as this can introduce bias. The PyroMark Assay Design software limits this bias by introducing a redundant ‘A‘ base where the binding over the CpG site would occur.
 Generally, one mismatch should be tolerated. Alternatively, instead of an ‘A‘ base here you could have a ‘Y‘ base which would indicate either a ‘C‘ or a ‘T‘ during primer synthesis. The primer mix will contain equal copies of both constructs where those with the ‘C‘ will select the methylated CpG site and those with a ‘T‘ will bind to the unmethylated constructs.
Prefer primers which bind over non-CpG cytosine bases
During the bisulfite reaction, all of the cytosine bases which do not form a CpG site should be converted to a uracil (‘U‘) base, and ultimately as a thymine (‘T‘) base after PCR. Therefore, by having primers which bind over converted cytosines bases this will select for bisulfite converted constructs.
Keep the PCR product size short
Since the bisulfite reaction is quite harsh, the majority of bisulfite DNA will be highly fragmented. Thus, keep your PCR fragment size small (up to 300 base pairs) to enable successful amplification of your region of interest. If you require a sequence that is longer than 300bp, try splitting your assay up into multiple runs.


Thanks, this is helpful!
Is there a way to set which primer (Forward or Reverse) you want the 5′ biotin tag modification to be on in the PyroMark Assay Design software?
It seems like the default is to always put the biotin tag on the reverse strand. My understanding is that this would give me a read of C to T conversion of the reverse strand but I am interested in C to T conversion of the forward strand.
If there is no setting in the software, do you know if I can just change the biotin tag to the forward primer when I order the primers? I assume this change would also require me to change the sequencing primer as well
Hi Maureen,
Many thanks for the comment!
I do not know of any option where you can select which primer to place the biotin tag on the software. Usually this is put on the reverse primer – but not always. If you want to sequence the opposite strand (the forward strand in your case) you can just let the software design the primers and if it places the biotin tag on the reverse primer – simply add it onto the forward primer instead. Then you will need to create a new sequencing primer, as you said. You can do this manually – or you could try entering the forward and reverse primer sequences into the editor and ‘lock’ them in by clicking the grey round buttons. Then let the software try and design a sequencing primer for you?
I hope that makes sense.
Best wishes,
Steven